Showing posts with label recipes. Show all posts

Monday, June 01, 2015

eating living foods

I promised I'd post some of the things that have helped me get my kids to eat more goodness. We are trying to eat a lot more food that is alive around here.  Plants.  Things that have recently been growing.   I'm not really that good at this yet, really, I have so far to go, but we're putting forth a good effort around here.  And things seem to be changing slowly.

I think the first, and most important step, is modeling good eating yourself and being super excited about eating good things.  My dear friend Eva is so good at this.  She is crazy good at feeding her family healthy, living food.  We meet up with her about once a month for a hike or afternoon at the beach and whenever we leave her my kids are all psyched to eat power foods.  They come home wanting to learn to fry fresh laid eggs and begging me to buy power greens at Costco for smoothies.  Eva motivates like this just by being so excited about it herself and by talking about how good it is for your body. 

At first when I went all vegetablly (trying to eat 10 servings of veggies a day) my kids thought I was crazy.  Especially Hazel.  She still mocks my love of arugula and tells everyone she knows how much salad I eat, as she rolls her eyes.  But it's starting to rub off on my kids.  Hazel asked me the other day to make her what I consider to be my yummiest arugula salad.  After detesting that food, and mocking me mercilessly for liking it, now she wants to like it.   That's a win.

Second, at least for my kids (and husband), it was important to not make a big deal about how I was changing the way we eat.  I think they'd have been pretty resistant to some kind of challenge to stop eating processed foods, or sugary yogurt or to eat more veggies.  Instead I just stopped buying a lot of the bad stuff.  Stopped filling our snack basket with dry, dead, processed foods.  Stopped buying treats and stuff with extra sugar.  Started buying A LOT more fruits and veggies.  Altered our dinner menus to have less bread and more greens.  They noticed a little big at first, but haven't really said much.  Occasionally they'll ask for something I used to buy, but they forget soon enough. 

Third, (and this is the hard part for me) I have to have lots of living stuff that my kids like on hand all the time.  It has to be easy to put out and prepare.  I haven't found a great way to make this as easy as handing them a granola bar, but I'm working on it.  One thing that seems to help is to buy things that are pre-cut up – baby carrots, celery sticks, small cucumbers and peppers.  And I try to spend a little time after going to the grocery store to cut up a bunch of veggies so that they're easy to pull out. 

I loved this idea from the Power of Moms Instagram feed, but I haven't had the energy to go and buy one of these yet, where would I store it in my small kitchen?  Maybe always in the fridge with veggies in it….maybe not.
I have been surprised to find that if I have a big plate of veggies and some dip out on the island afterschool it's usually empty by dinner.   Kids are hungry and will eat what's easy to grab, especially if there aren't a whole lot of other options in the pantry.  The dip is key for my kids.  I put out an easy home made ranch dressing and they gobble up the goods.  
It's super easy to make….not exact at all.  It's sort of a no recipe recipe, which is quickly becoming my favorite kind.  I hate the time and energy it takes to pull up recipes.  Don't be scared to experiment with this, it really is no fail.  Just keep tasting an adding till it tastes right.  Here are the basics:
For the base put a mixture of maybe 2/3 plain yogurt to 1/3 low fat mayo (you can change these ratios depending on what you have on hand and how thick or thin you want your dip).  If you want to give it a little more tang with more of a buttermilk taste you can either just use all yogurt or add a little vinegar to your base.  
Next, add salt and add other seasonings to taste. 
To make it taste like traditional ranch you really need to add Dill and Celery salt.  I also add garlic powder, parsley and either dried onion, onion powder, or, if i have fresh chives from the garden I chop those up and throw them in.  Fresh dill and parsley makes this awesome….but the dried stuff is pretty good too and there's no weird MSG or sugar added.  And for some reason it's easier for me to keep this on hand than Ranch just cause I always have yogurt and dried spices around. 
And last, for now, GREEN SMOOTHIES.  I make one for my kids nearly every morning and set it out with some carrots and their cereal/oats.  The smoothies are getting greener and greener as we go on (and sometimes dark brown if I put in berries).  The kids are getting less sensitive to the color and I'm not sure that they've noticed that they're getting less and less sweet. 
Here's what we usually put in our smoothies:
Lots (like half a blender full) of spinach or other dark greens (kale, power greens from Costco). An orange.  Half a banana.  Mixed frozen fruit (the pack I buy comes with melons and peaches and strawberries).  Sometimes a leftover avocado half.  Sometimes a small slice of lime.  Sometimes some baby carrots.  Sometimes some left over beets.  Sometimes some berries (but this makes it brown not green) and enough water to make it blend-able. 
And I think the thing that helps the kids want to drink the smoothies more than anything are these awesome stainless steel straws I bought.  For some reason the kids love them and I challenge them to drink all the way down the the slurpies (when your straw starts sucking up air).  This is an exciting challenge for Peter, never gets old.
By no means am I queen of all this healthy eating, but I feel like we're on the right path, away from dead processed dry stuff and towards all that living goodness.
I would LOVE to hear what works for your family!  Please share.  I'll keep sharing too. 


Friday, December 07, 2012

it’s beginning ….

to look a lot like Christmas around here again! 

IMG_9226

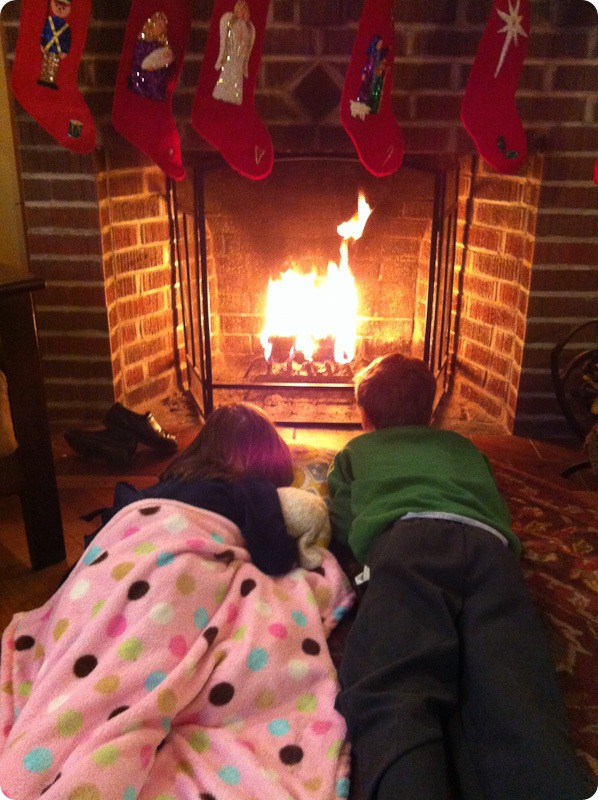
Which means lots of wonderful magical things.  Fires in the fireplace, excited children, smells of pine and cinnamon, pine needles all over the floor and the soft glow of Christmas lights.  IMG_4042Oh, I love Christmas (even if it is not all sweet and perfect).  There’s so much I want to say about Christmas, so much I want to ask (like how in the world do you tone things down?!? but that’s a subject for another post.) For now, I’d like to share two favorite treats that start becoming regulars in our kitchen when all this Christmas hub bub begins. 

At the beginning of the season I always assemble about 8 zip lock bags of the dry ingredients for these Molasses Spice Cookies so that I can whip these together at a moments notice.  They are hands down the best Ginger cookies you will ever taste.  The smell of them, the taste of them, everything about them tells your whole body  that it is Christmas. These are always a huge hit when I bring them to holiday parties too.  Just make sure to make them big enough and don’t cook them too long!

Molasses Spice Cookies Recipe – Cooks Illustrated

Preparation time: 30 minutes.

INGREDIENTS
  • 2 1/4 cups all-purpose flour
  • 2 teaspoons of baking soda
  • 1/2 teaspoon of salt
  • 1 teaspoon ground ginger
  • 1 1/2 teaspoons ground cinnamon
  • 1/4 teaspoon ground allspice
  • 3/4 teaspoon ground cloves
  • 3/4 cup (1 1/2 sticks) unsalted butter, softened
  • 1/2 cup dark brown sugar, packed
  • 1/2 cup granulated sugar, plus 1/3 cup for rolling cookies
  • 1 large egg
  • 1 teaspoon vanilla extract
  • 1/3 cup unsulphered molasses
METHOD

1 Preheat oven to 375°F. Mix together flour, baking soda, salt, cinnamon, ginger, cloves, allspice together in a bowl and set aside.

2 Use an electric mixer and beat the butter for 2 minutes. Add the brown sugar, and 1/2 cup granulated sugar and beat until light and fluffy, about 3 minutes with mixer set at medium speed. Add egg, vanilla extract, and molasses. Beat until combined, about 30 seconds. Scrape down sides of bowl with a rubber spatula.

3 Add dry ingredients and beat at low speed until just combined, about 30 seconds.

4 Place remaining 1/3 cup of granulated sugar in a shallow bowl. Working with 2 Tbsp of dough each time, roll dough into 1 3/4 inch balls. Roll balls in sugar and place on ungreased cookie sheets, spacing them 1 1/2 to 2 inches apart.

5 Bake until the outer edges of the cookies begin to set and centers are soft and puffy, about 9-10 minutes. Cool cookies on sheets for 2 to 3 minutes before transferring them to cooling racks .

Note: PLEASE DO NOT OVERCOOK!!!  This is key here.  The centers of the cookies should be soft and spongy when you take them out of the oven, otherwise they will end up hard and dry.  They will not look done when you take them out. 

IMG_9258

This hot cocoa maker lives on my kitchen countertop during December.  You’ll never go back to Swiss miss after making this hot cocoa.  The recipe is on the Hershey's cocoa box:

4 cups milk

1/3 cup water

1/4 cup cocoa

1/2 cup sugar

a few squirts vanilla

1/2 tsp salt

The hot cocoa maker is one of my favorite purchases ever.  It’s loud, but it makes perfectly heated, frothy hot cocoa in a matter of minutes.  You can certainly do the same thing in a pan on the stove, it’s just not quite as fun (or frothy). 

I also use this to make steamed milk for the kids before bed sometimes for a treat.  And, if I’m feeling defeated and need a little lift during the afternoon lull, I put a cup of milk and a lump of Nutella in there for a yummy, warming, calming treat. 

Enjoy!

Sunday, September 18, 2011

9 years and a new favorite salad

Jeff and I celebrated our nine year anniversary.   but it was a week late.  on the actual day we were packing up for our trip out to CA from Jeff’s brother’s wedding.  Jeff went to sleep on the couch in the basement because there was so much stuff on our bed and I stayed up late getting things packed up and cleaned up.  it was a little depressing and made me long for those early days when life was simple.  but live also wasn’t nearly as rich.  and, I didn’t love Jeff nearly as deeply as I do now, that love is pressed into me with the weight of all our shared experiences and work and challenges and joys. 

IMG_1081once we got settled into our ten day stay in California we took advantage of Jeff’s parents and went out to celebrate.  They treated us to a gondola ride on Lake Merritt in Oakland that they got with a groupon (I love those things!) and then we went out to dinner.  The gondola ride totally exceeded my expectations, it was a beautiful authentic hand crafted boat (nothing like the only other gondola I’ve seen at the Venetian), a calm twilight, a gondolier from Italy who sang really beautiful soft songs as he rowed us around the lake all light up with lights around the shore. 

IMG_1076(That’s not us in the boat….)

And dinner was great, once we ( I ) decided on a restaurant (Jeff knows after nine years that he needs to just be patient with me as I agonize over that decision).  I don’t know why that decision is so stressful for me.  Probably because I love to eat really good food in a good ambiance and I don’t get to do it very often, and it totally bums me out when we end up at a crapy overpriced place.   We ate at the Wood Tavern in Berkley and I ordered something I won’t ever forget, it was so good.  You know those kinds of finds?  Maybe it’s just a girl thing, or just a me thing, but there are a handful of restaurant experiences that get stamped in my memory forever they’re so good.  I hate spending money on food, but when it’s excellent it’s  totally worth the price tag. 

It was a salad and I’ve tried to recreate it.  I’ve made it every night this week.  It doesn’t taste as delectable as it did that night, but it’s pretty close.  Try it, you’ll like it.

Chopped Romaine Salad

chopped romaine (chop it up real small, like you’re going to put it on a taco)

cucumber (peeled, deseeded and chopped into 1/2 “ cubes or little crescents)

good crumbled feta cheese

fresh peas (though I used frozen thawed peas)

crushed toasted almonds (the real salad had hazelnuts, which were delicious, but I can’t sacrifice the time or money to hunt them down)

1/2 cup cooked quinoa

chopped mint (not too much, it’s strong)

Dressing (basil vinaigrette)

  • 1 teaspoon Dijon mustard
  • 1 shallot, roughly chopped
  • 1 clove garlic
  • 1/2 teaspoon salt
  • 1/2 cup roughly chopped basil leaves
  • 1/3 cup seasoned rice wine vinegar
  • 1/2 cup olive oil

blend all ingredients in a food processor, adding oil last in a slow stream.

The secret to this salad is getting everything chopped right, and dressed evenly.  When you do that you get all those yummy flavors in every bite. 

And, it tastes so summery and fresh.

And it looks so green and healthy.

And it reminds me of my 9th anniversary with Jeff who I love deeply, even if it will take him another 9 years to decide he likes this salad.

LinkWithin

Related Posts with Thumbnails